# User Pages
# The home page & side bar
| [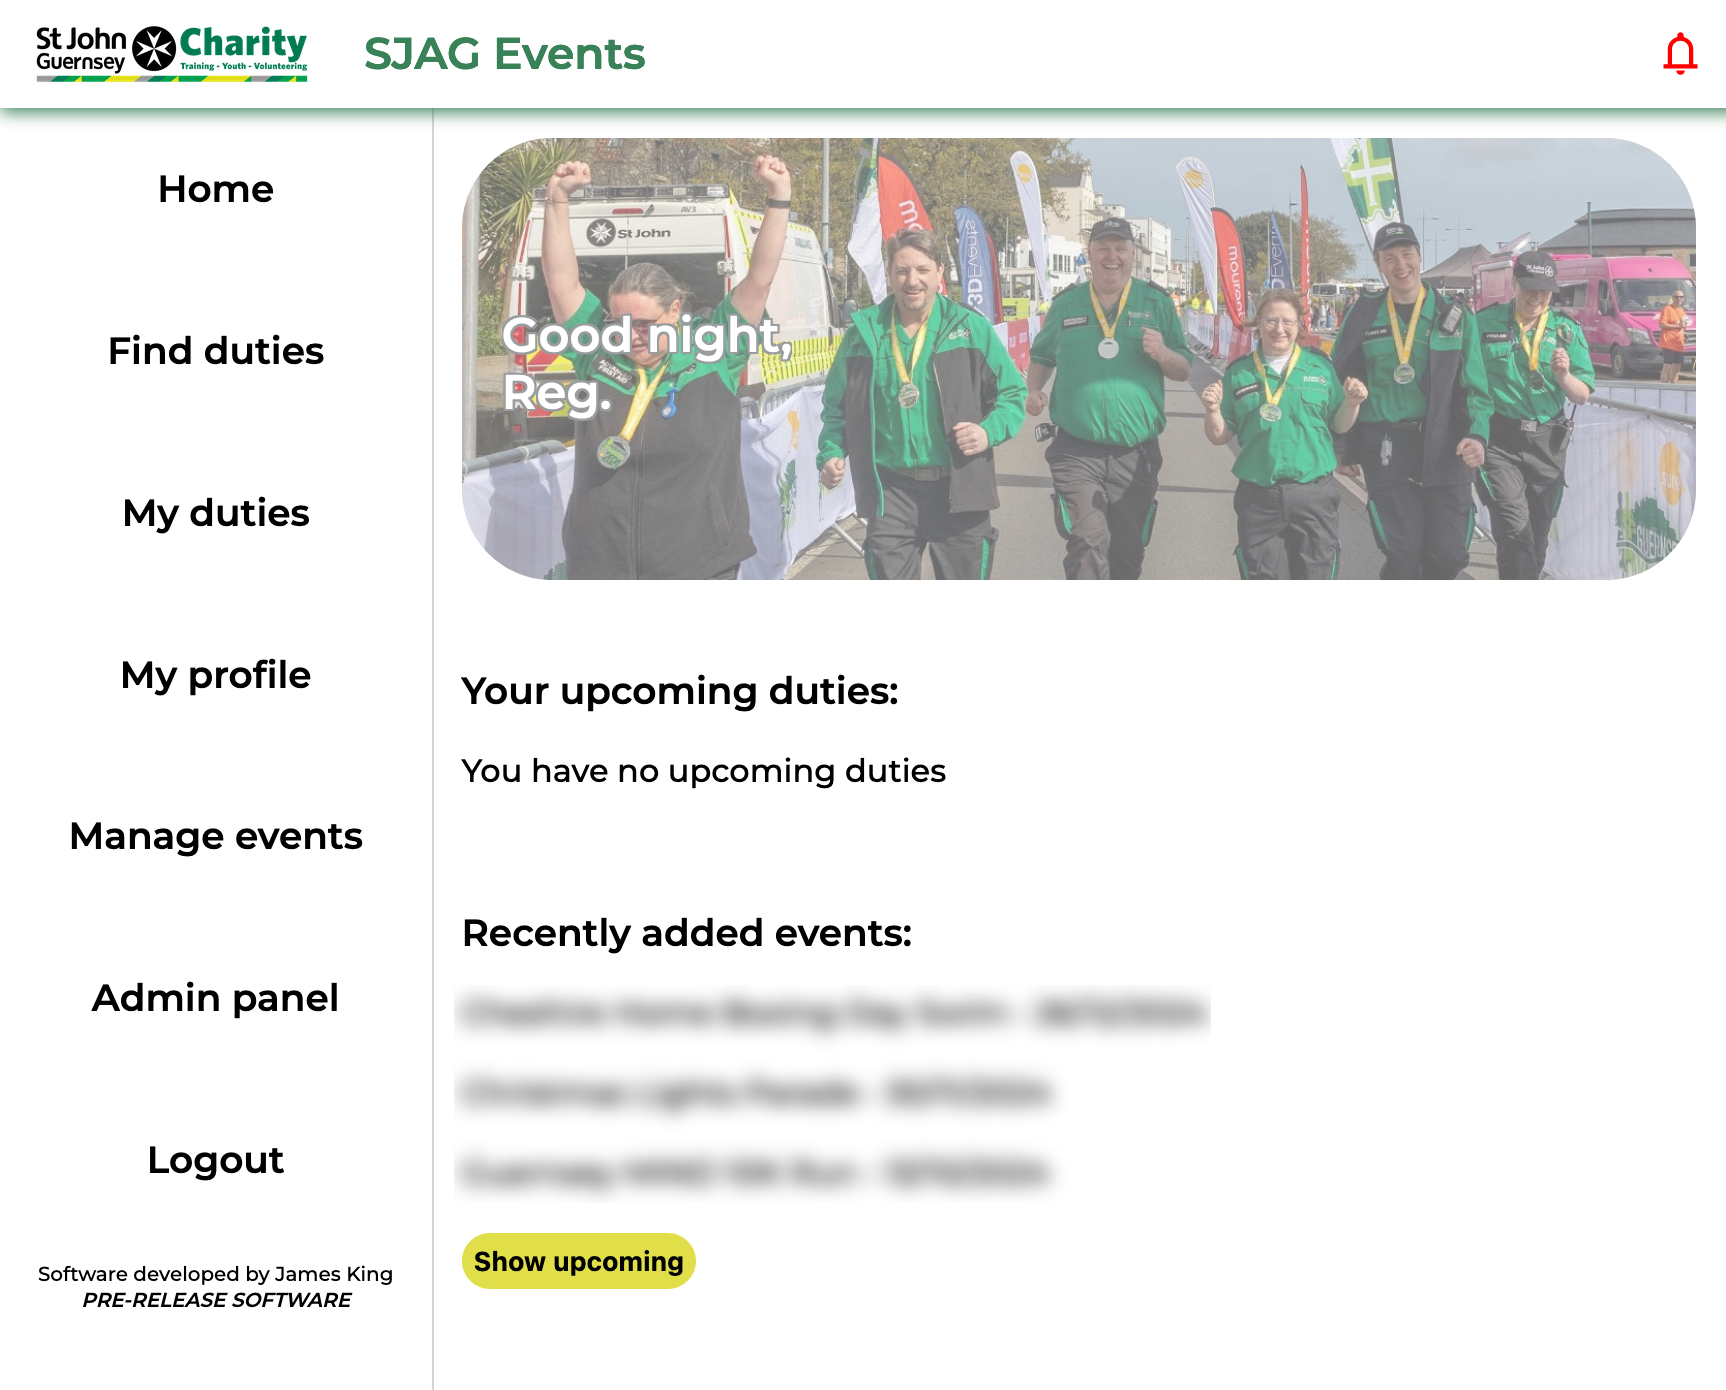](https://docs.jamesdev.co.gg/uploads/images/gallery/2024-09/homepage.png) | SJAG Events is primarily navigated using the left side bar, this contains links to the major actions of the website. The contents of your side bar will differ slightly, depending on what system roles you have. Clicking on any of the buttons will take you to the associated page. Clicking on the lowermost button, below login, will show the 'about' page.
On the homepage, your closest duties will be displayed. Additionally, you can also see events that have been recently added to SJAG Events, and upcoming events.
The bell in the top bar opens your notification inbox. When you have unread notifications, the bell is read, when your inbox is clear, it is green.
|
# My notifications
SJAG Events notifies you whenever an action affecting your account, your duties, or events you are on, and more depending on your system roles. These messages are delivered in three ways:
- **The system notification (My notifications) page** found by clicking the bell icon in the top bar.
- **Email notifications** delivered automatically to the email address assigned to your account.
- **Push notifications \[BETA\] ** once permission has been given, are delivered directly to your mobile device (when saved on the home screen) or desktop browser.
To enable push notifications, follow the instructions in [*My profile*](https://docs.jamesdev.co.gg/books/sjag-events-user-guide/page/my-profile "My profile")
Both email and push notifications contain a link to the notification on the system notification page, which serves as the main store of all of your notifications.
| [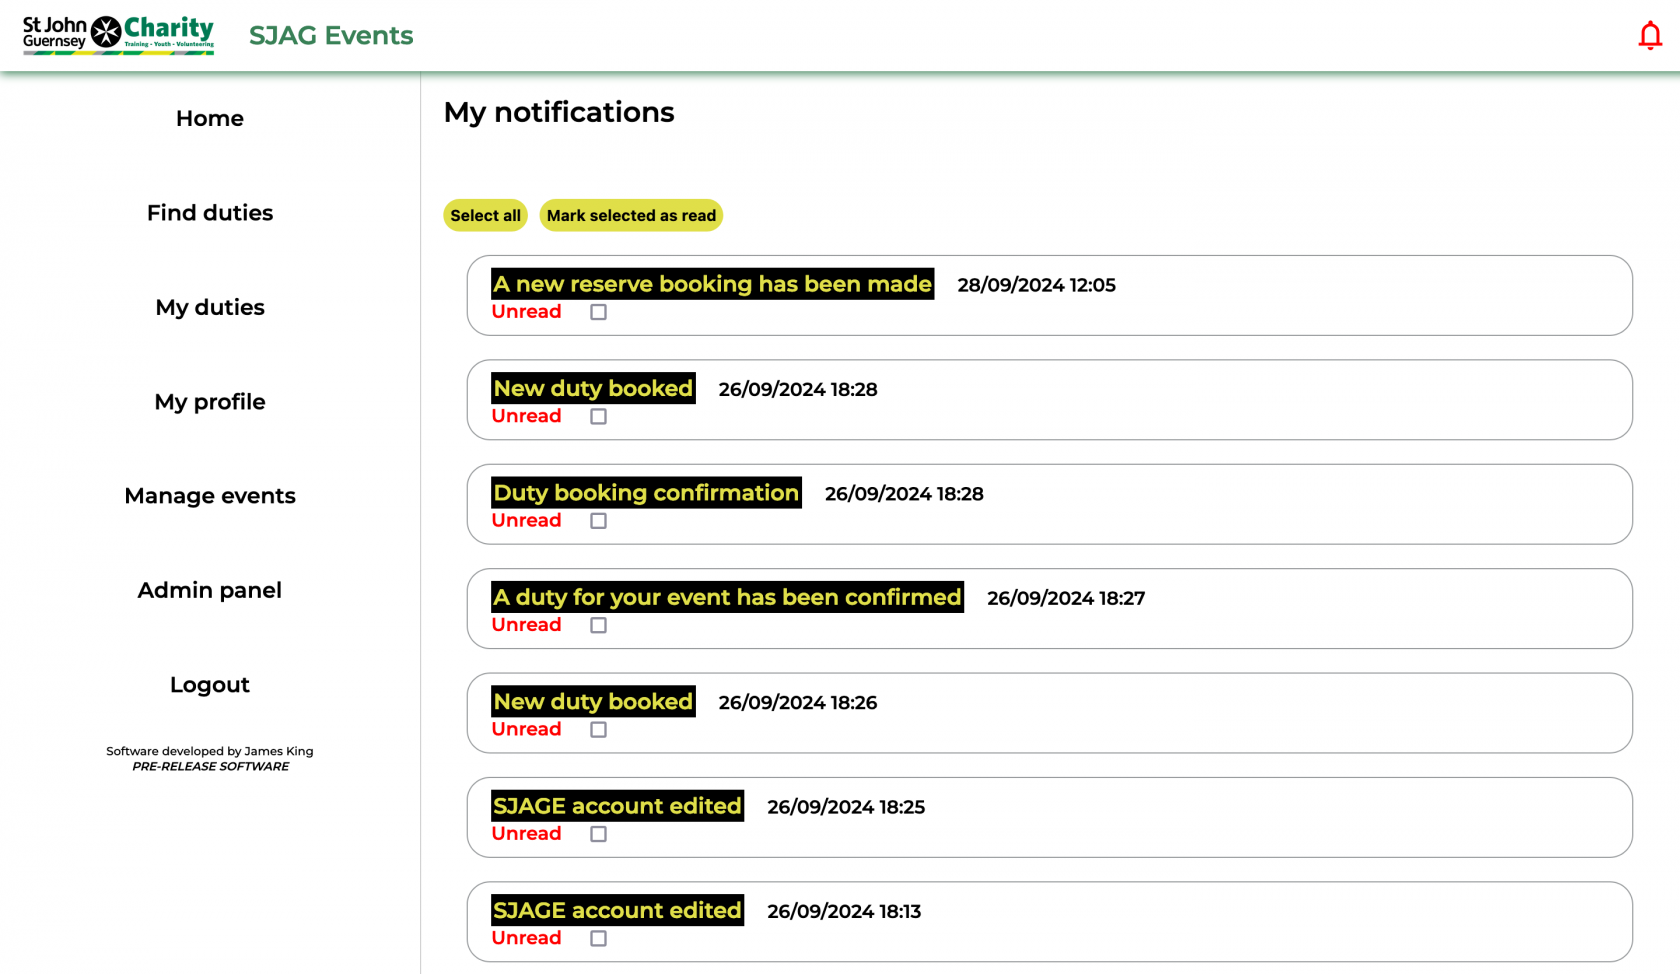](https://docs.jamesdev.co.gg/uploads/images/gallery/2024-09/notifications.png) | All of your notifications are shown as info bubbles, with the most recent at the top. Clicking on the info bubble will open up that notification. A red message indicated that you have not yet opened that notification on the system, and a checkbox will be shown for selection.
You can select unread messages manually, or by using the select all button at the top of the page, to mark them as read by clicking the 'Mark selected as read' button.
|
| [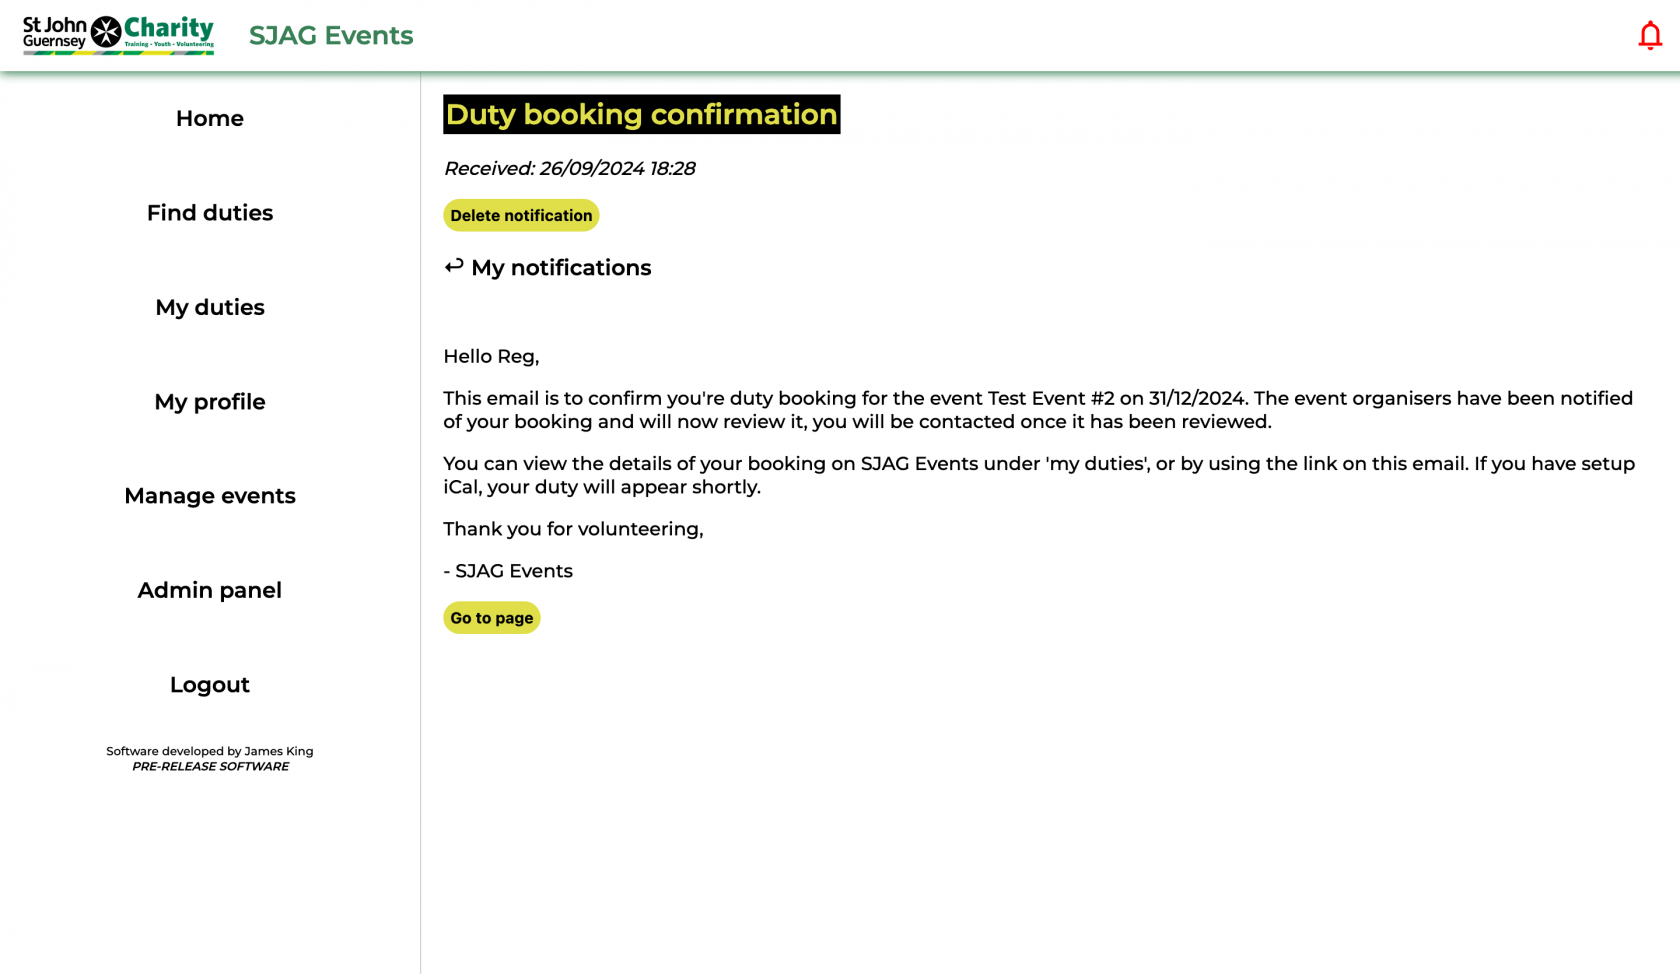](https://docs.jamesdev.co.gg/uploads/images/gallery/2024-09/notification.png) | The notification is displayed on the page, clicking the back button will return you to the 'My notifications' page. Clicking 'Delete notification' will permanently delete that notification from the system.
On some emails, clicking 'Go to page' will take you directly to the related page on the site.
|
# My profile
| *[](https://docs.jamesdev.co.gg/uploads/images/gallery/2024-09/myprofile.png)*
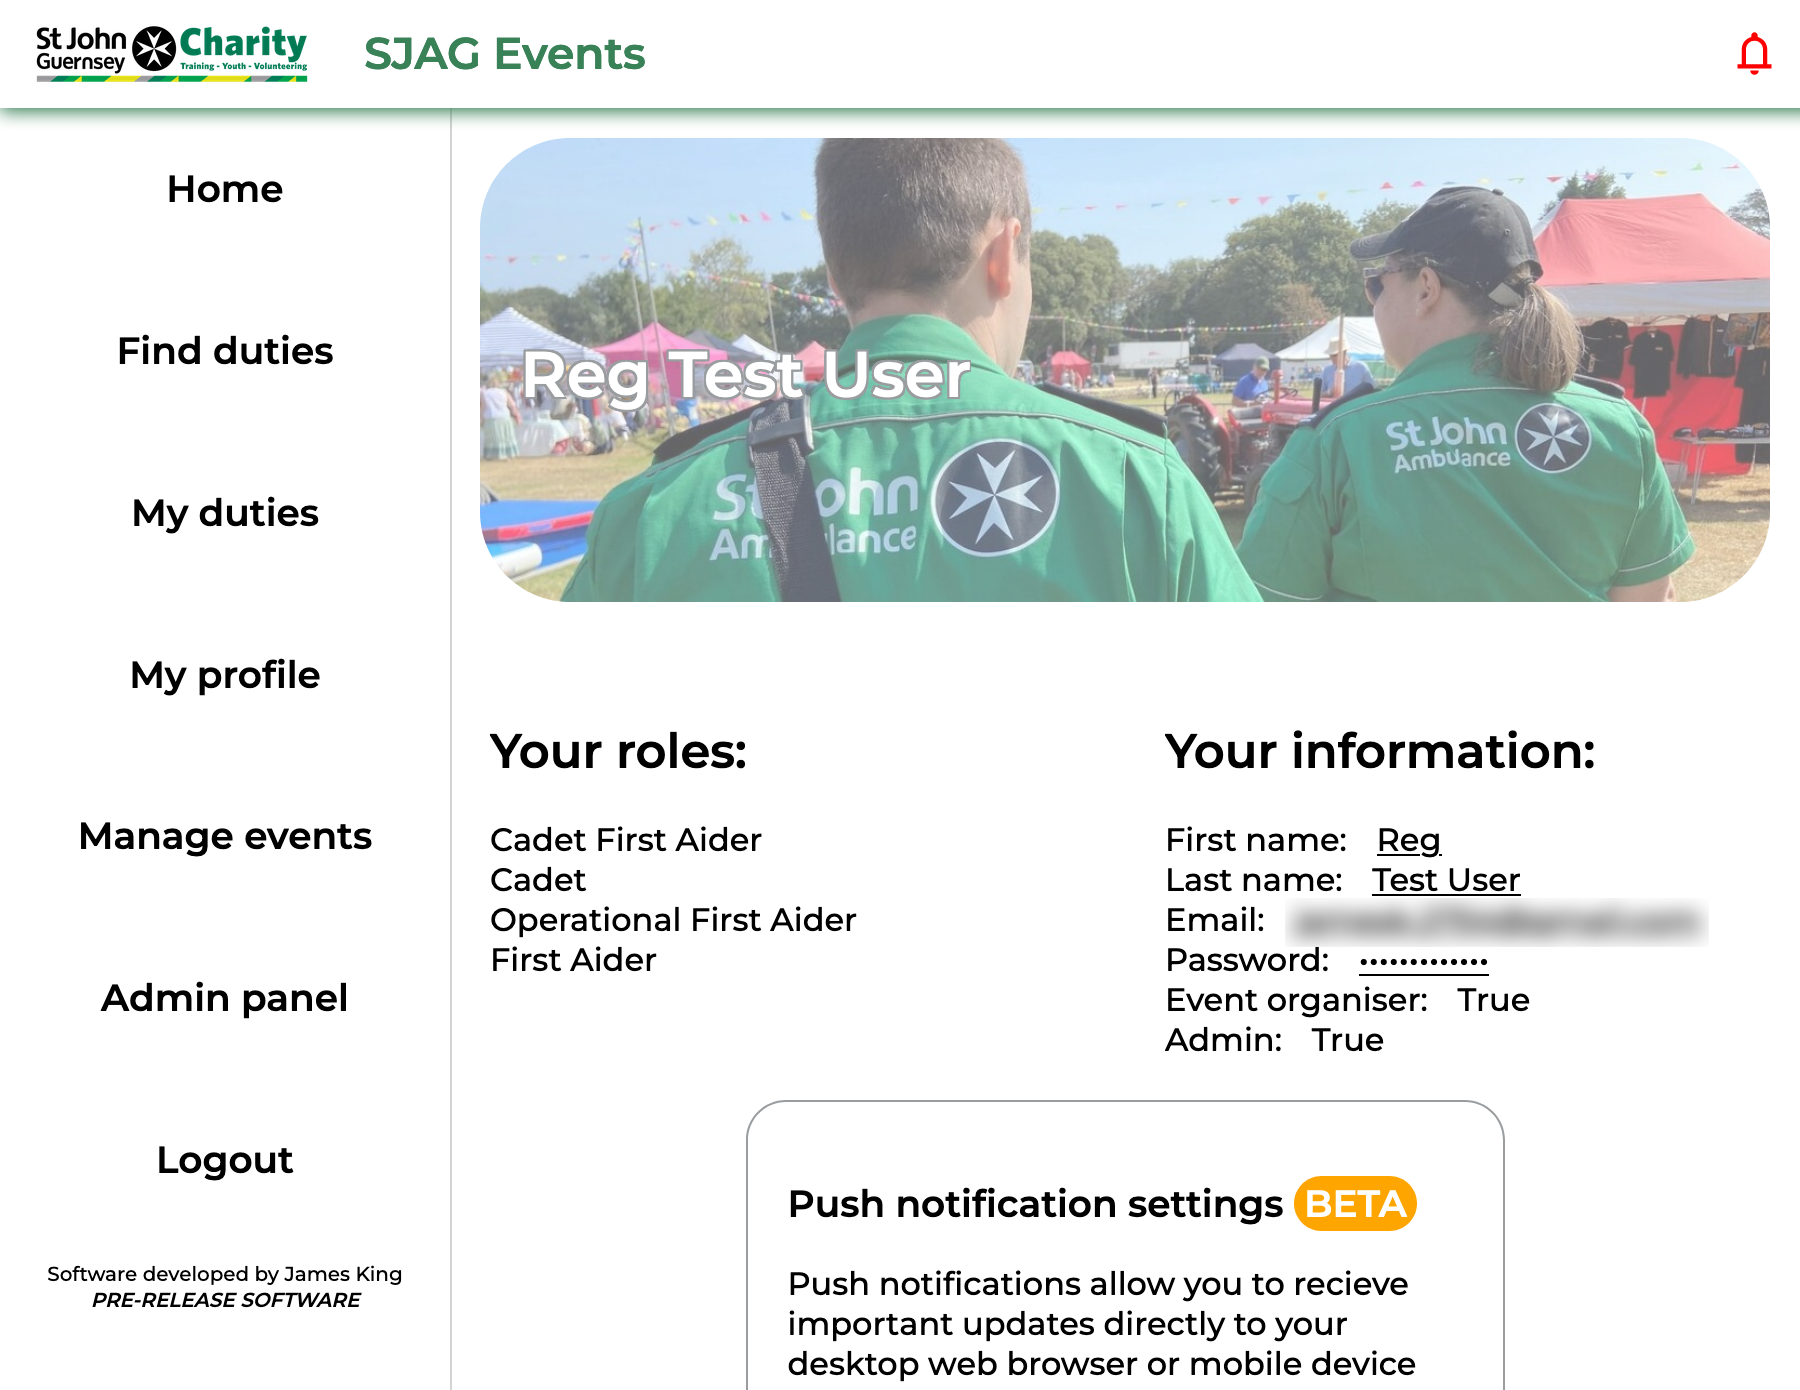
| The 'My profile' page allows you to edit your user information stored on the system. Click the links on the right side of the page to change your name, email, and password.
|
| *[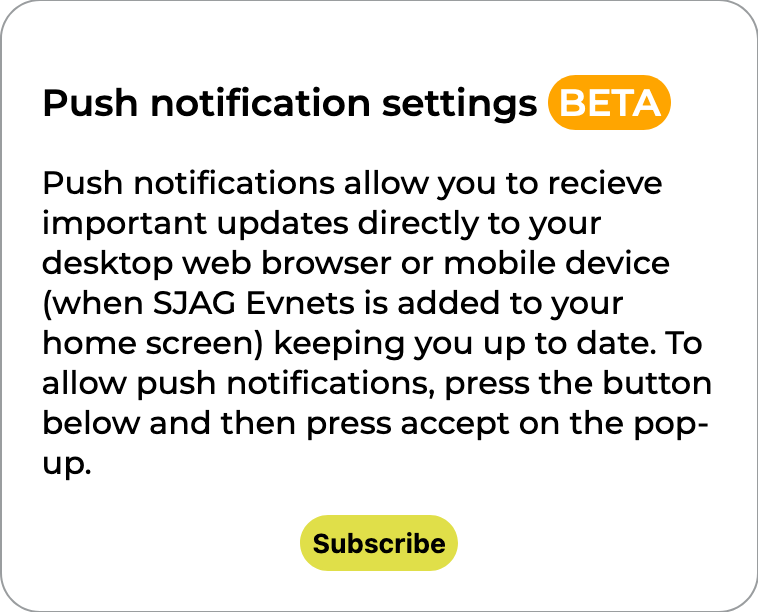](https://docs.jamesdev.co.gg/uploads/images/gallery/2024-09/pushcontrol-v1.png)* | **Push notifications** **\[BETA\]**
Push notifications allows SJAG Events to deliver important updates to you directly, instead of through your email inbox, when the site is used on a desktop web browser or is added to the home screen on mobile. Navigate to the 'My profile' page and click the 'Subscribe' button, you may see another prompt after this confirming that you would like to receive push notifications.
**Note:** push notifications are an experimental feature and can be unreliable - especially on iOS. Check your inbox frequently or the notification page on SJAG events for up-to-date messages.
|
# iCalendar feature
SJAG Events supports the iCalendar protocol, allowing the system to communicate with the calendar on your phone, tablet, smartwatch, computer, and more. Through this, duties you make on SJAG Events will be automatically populated into your device's calendar, helping to keep your duties organised.
**Note:** iCalendar can take a while to update, depending on your device or app's settings. Please keep this in mind if your duty does not appear or update on your calendar instantly.
| [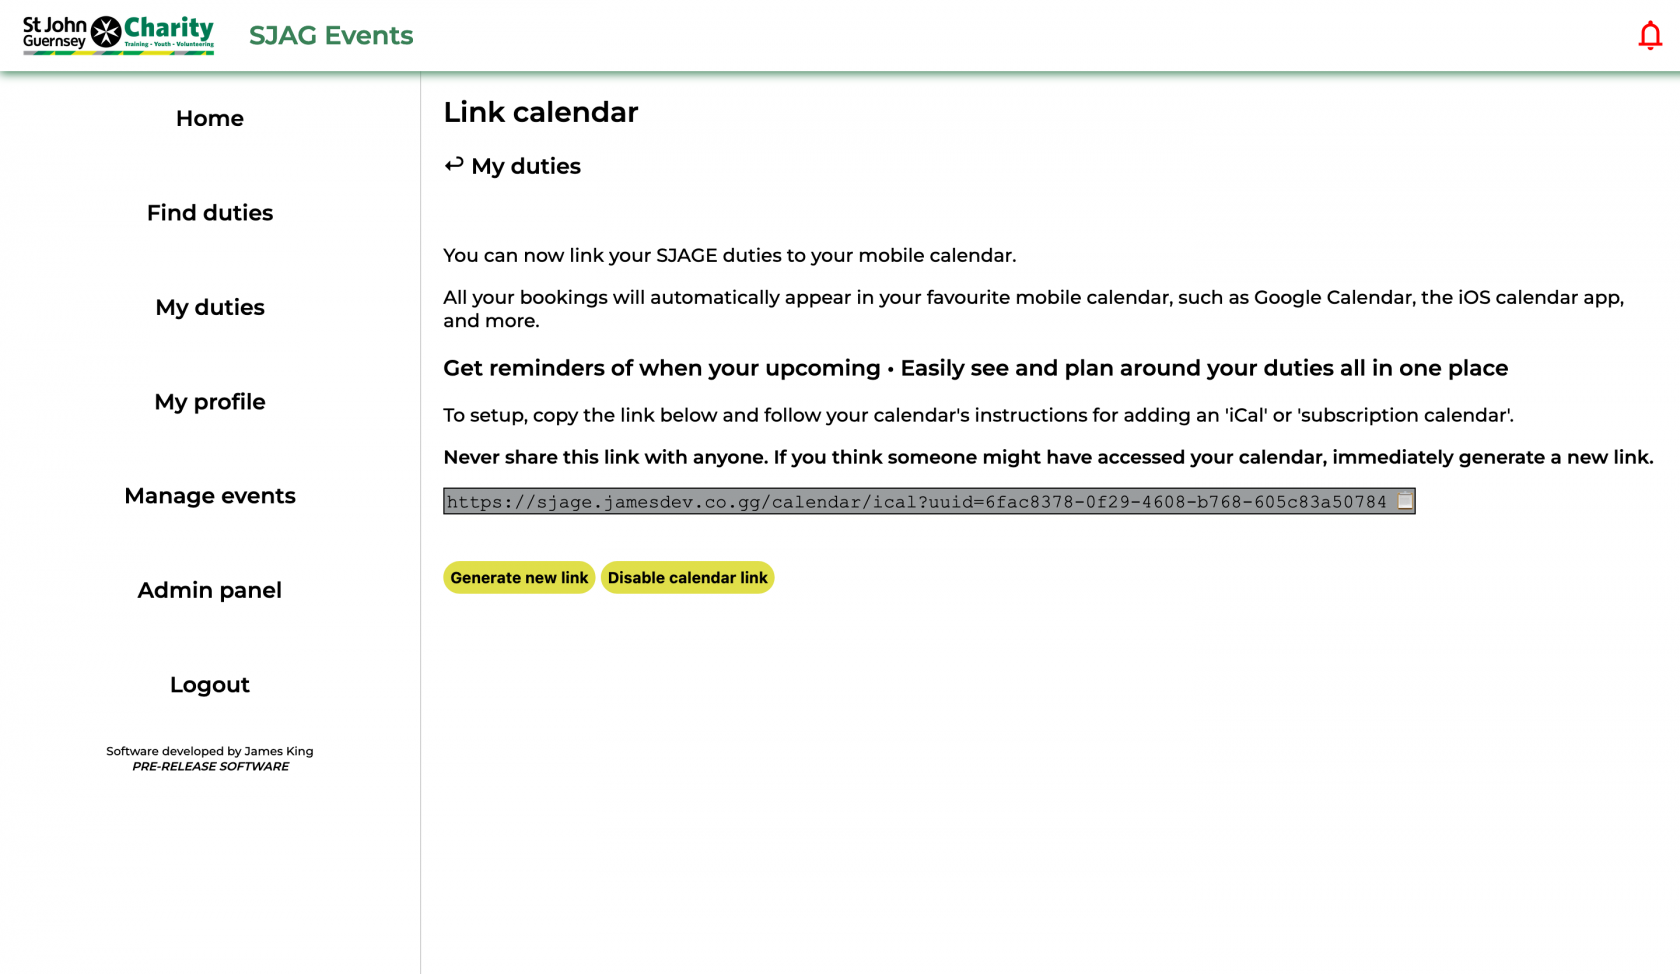](https://docs.jamesdev.co.gg/uploads/images/gallery/2024-09/ical.png) | To enable the iCalendar feature, click 'Generate new link'. You may only have one link at a time, one link may be used across several devices symultenously.
Your unique iCalendar link is displayed in the grey box, this can then be copied into your calendar app by selecting the text and copying it or by clicking on the clipboard emoji at the end to copy.
Setting up your calendar app to accept the iCalendar URL will differ from app to app, but is generally very simple. Attached to this guide are links to articles for the major calendar apps, follow the steps for subscription calendar URLs.
If you wish to stop using the feature, click 'Disable calendar link'. This will instantly deny any future requests to the system. If you wish to reenable iCalendar, you will need to regenerate a new link and enter this into your calendar app.
|
**SECURITY NOTE:** Your iCalendar link is unique to you, with the long string of text at the end being used by the system to identify and authenticate your calendar's request. **Never share this link with anyone.** If you believe someone else has gained access to your calendar link, immediately generate a new link.
# Find duties
| [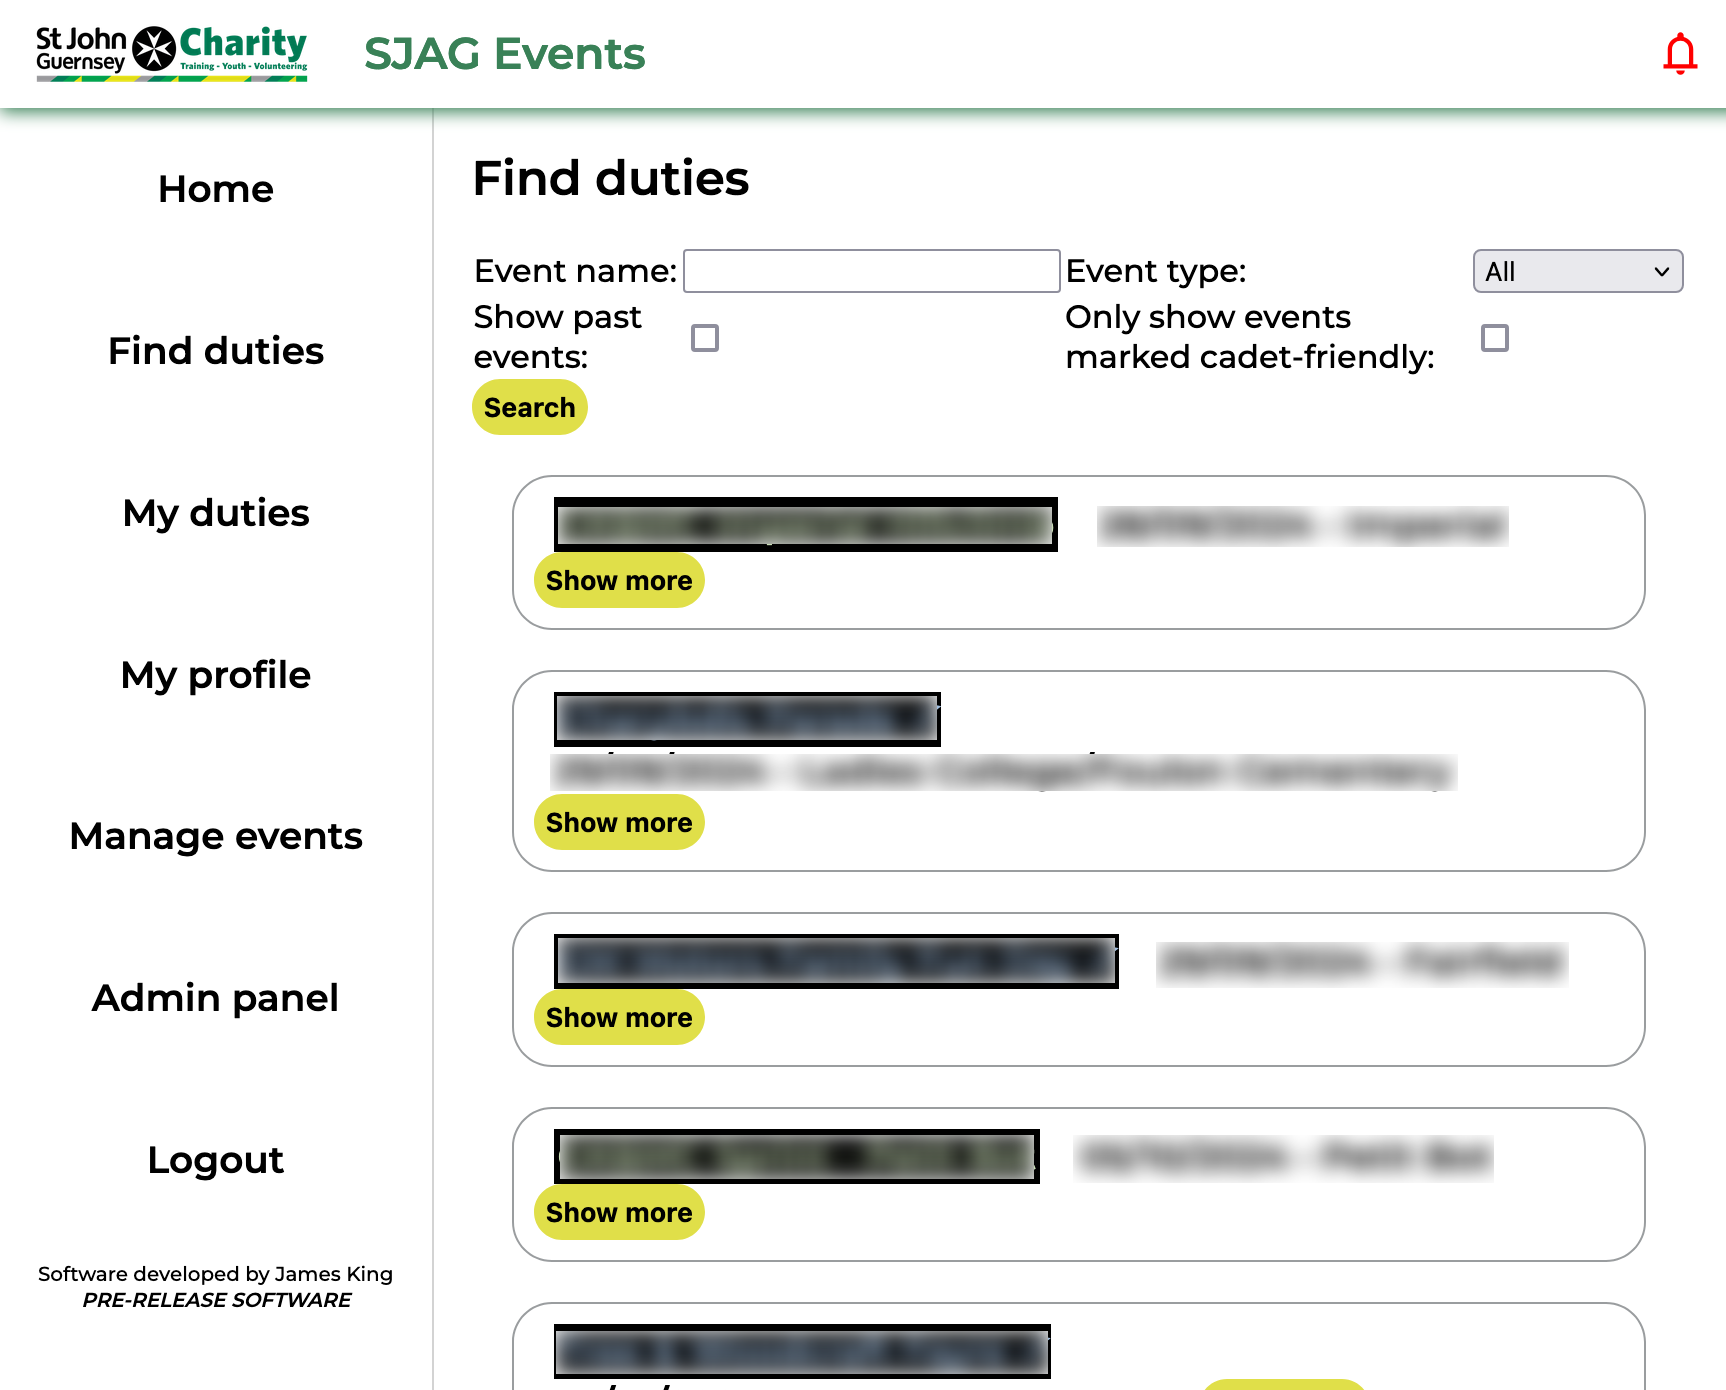](https://docs.jamesdev.co.gg/uploads/images/gallery/2024-09/find-duties.png) | The find duties page displays all available duties on the system. From here, you can search through events to find duties to book onto.
Duty names are colour coded according to the type of event, using the same key as the paper duty lists: SJAG in blue, EAS in green, and joint events in red. Events may also display a check mark in their name; this indicates that the event has been marked as cadet friendly, and that cadets are able to sign up for that duty if they wish.
By default, the page will display all available upcoming duties, however this search scope can be expanded and refined.
- Use the search bar to search for a specific event.
- Adjust what event types will be displayed: SJAG, EAS, and joint events.
- Show previous events by checking the box.
- Show only events which have been marked as 'Cadet friendly' by checking the box.
Each event is displayed in an "info bubble". To prevent overcrowding, these are collapsed by default, only showing basic information. Clicking on the 'Show more' button will expand the bubble to show more information.
|
| [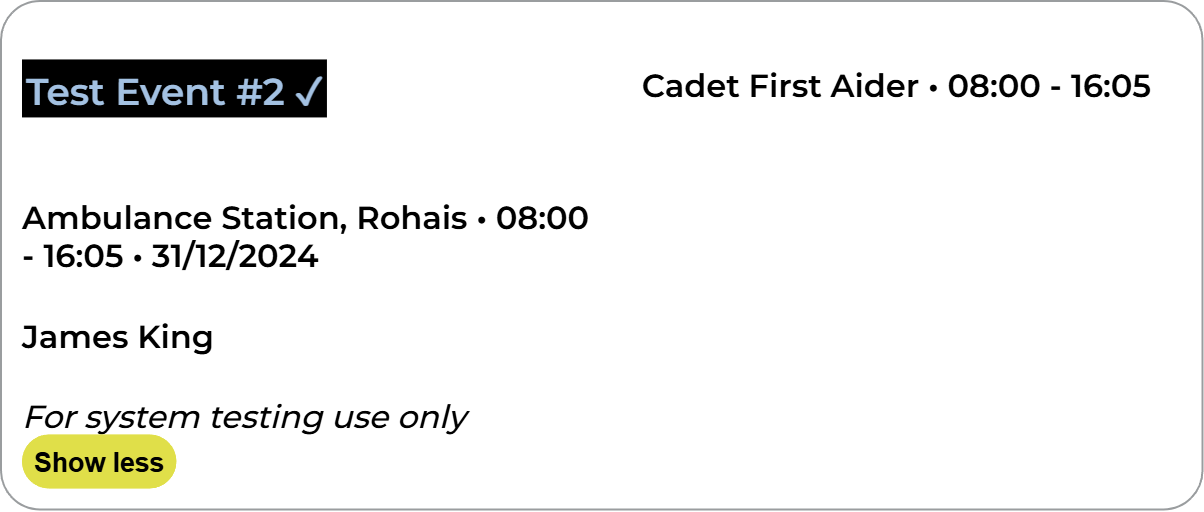](https://docs.jamesdev.co.gg/uploads/images/gallery/2024-09/findevent-infobubble.png) | Clicking anywhere in the bubble will open up the event page, this contains more information on the event and is where you are able to make bookings.
Clicking on the event organiser name will open your default email app on your device, with a new email to the organiser's address.
Clicking on a duty requirement, displayed on the right side of the bubble, will open up that requirement's booking page. From there, you can make a booking for that requirement if you have the correct role.
|
# Event overview
| [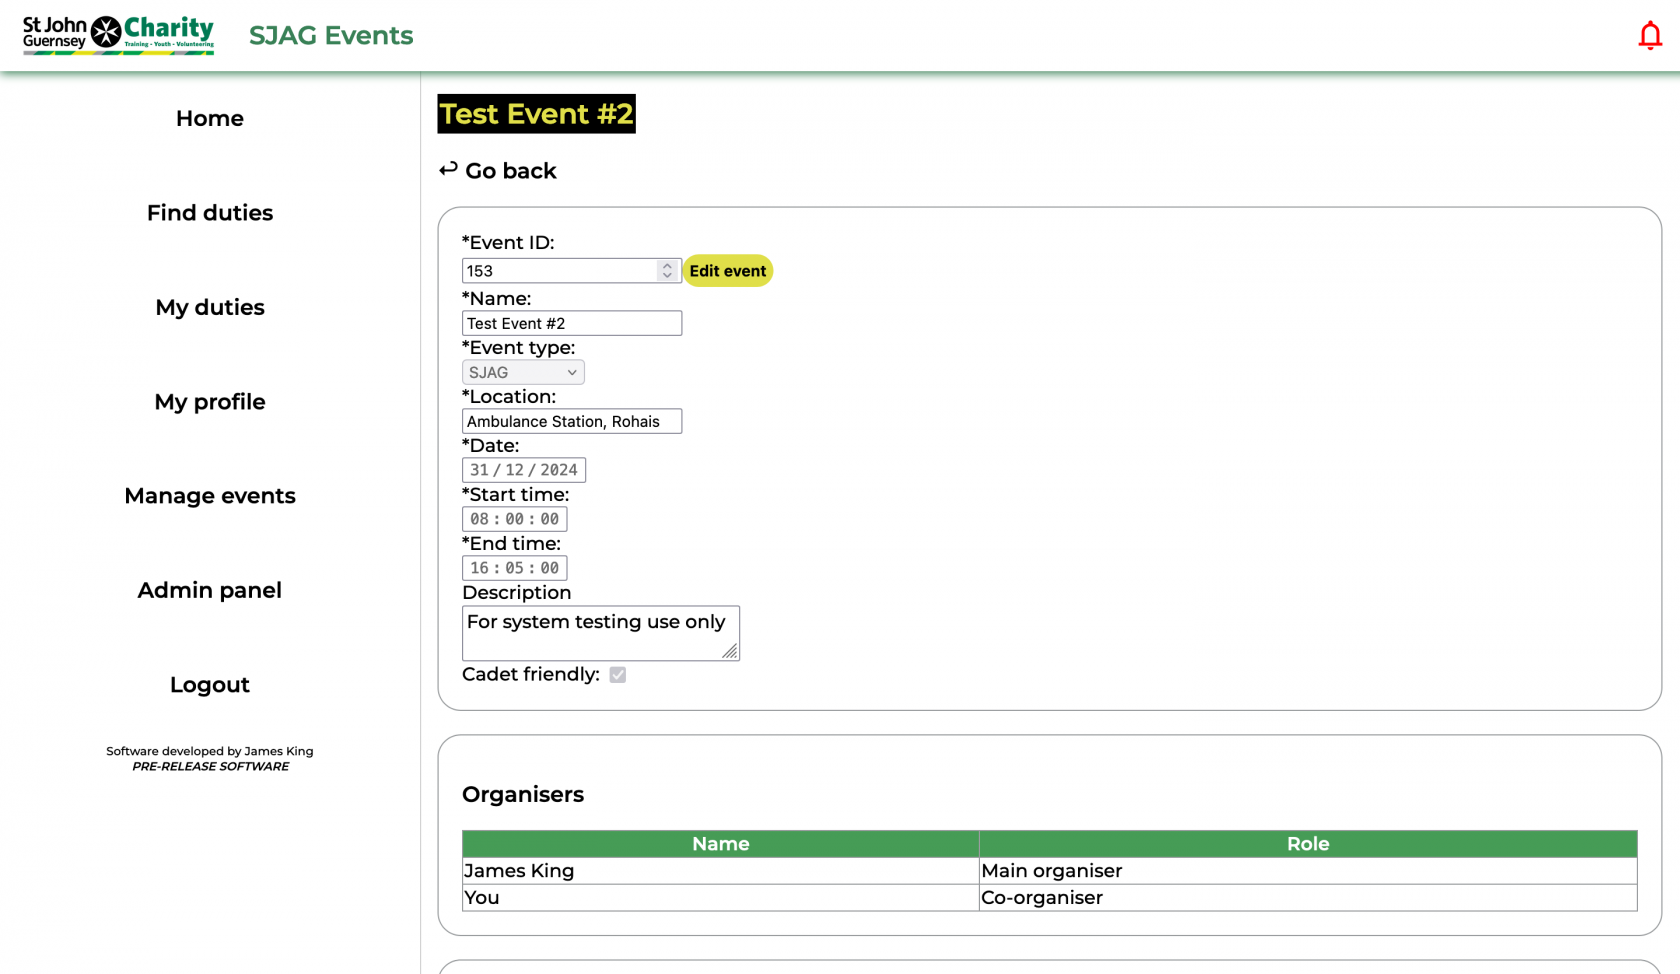](https://docs.jamesdev.co.gg/uploads/images/gallery/2024-09/eventpage-1.png) | The event overview page displays all the information about an event stored on the system.
The first box displays basic information about the event itself, such as the date, posted start and end times, location, and a short description.
The second box lists all the users who have been marked as event organisers for this event. These are the people responsible for the listing of the event on the site and the approval of all duty bookings for it. Click on the user will open your default mail client, with a new email addressed for that user.
|
| [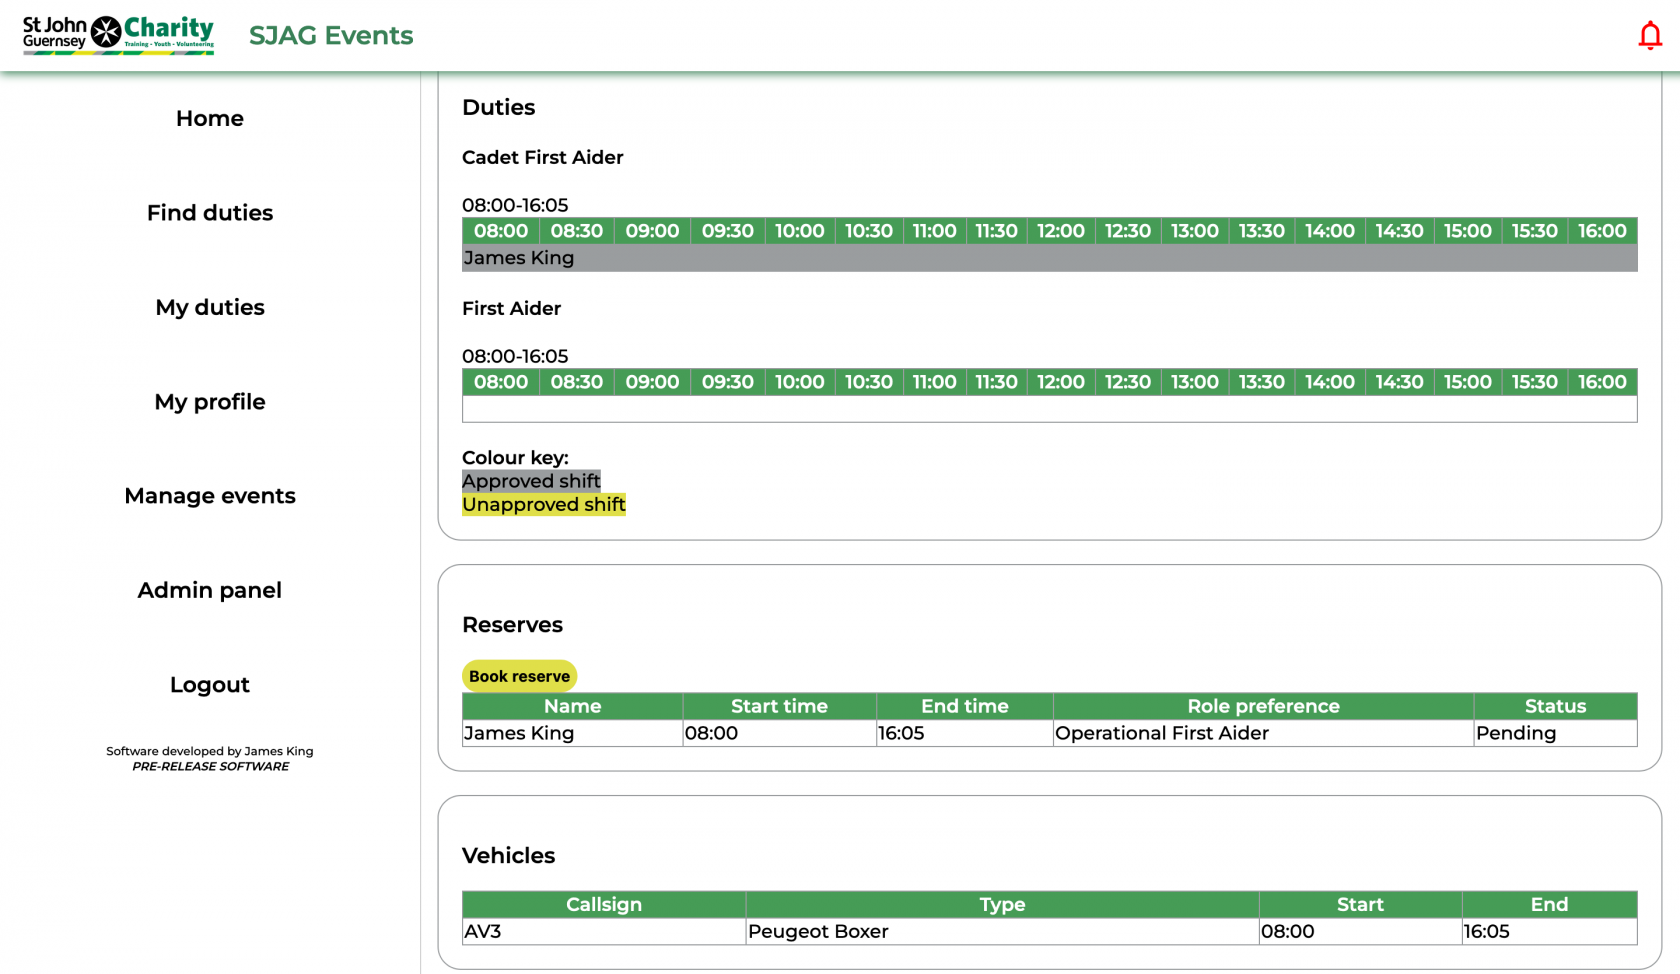](https://docs.jamesdev.co.gg/uploads/images/gallery/2024-09/eventpage-2.png) | The third box shows all the duty requirements for that event, with each requirement having its own timeline. Duties that are booked for that requirement are displayed on the timeline, indicating at a glance what times need to be covered. Bookings that have been approved by an event organiser are displayed on a grey background, and unapproved duties on a yellow background.
Where the user has the correct role to book onto a requirement, a yellow 'Book duty' button will be shown, click this to create a new booking for the duty.
To view or edit a duty you have booked, simply click on the duty in the timeline.
The fourth box displays all the reserve bookings that have been made for that event. To create a new reserve booking, click the 'Book reserve' button. To view or amend an existing reserve booking, click on the row in the table.
The final box shows the vehicles that will be used at the event.
|
# Book duty
| [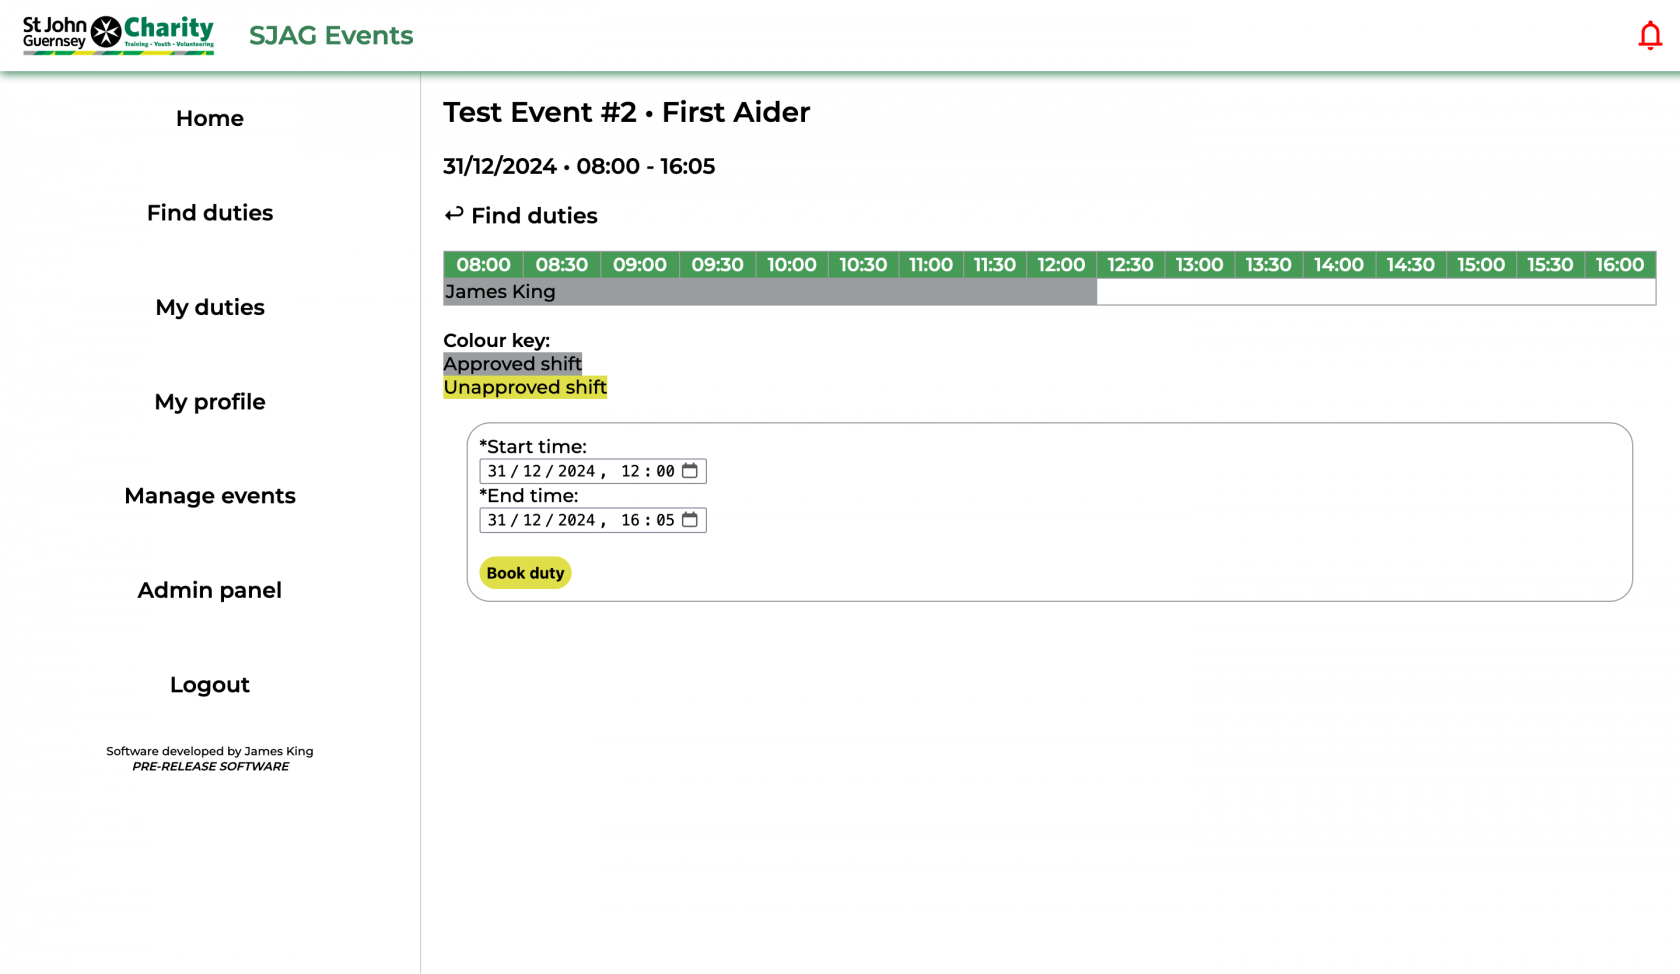](https://docs.jamesdev.co.gg/uploads/images/gallery/2024-09/book-req.png) | To create a new duty booking simply enter your desired start and end times, then press the 'Book duty' button.
Requirement bookings cannot overlap with other bookings on their timeline. Take care, and make sure to review any other duties to ensure that they do not overlap. Vacant slots are shown on the timeline in white, whereas other bookings appear in yellow and grey.
|
# View & edit duty
| [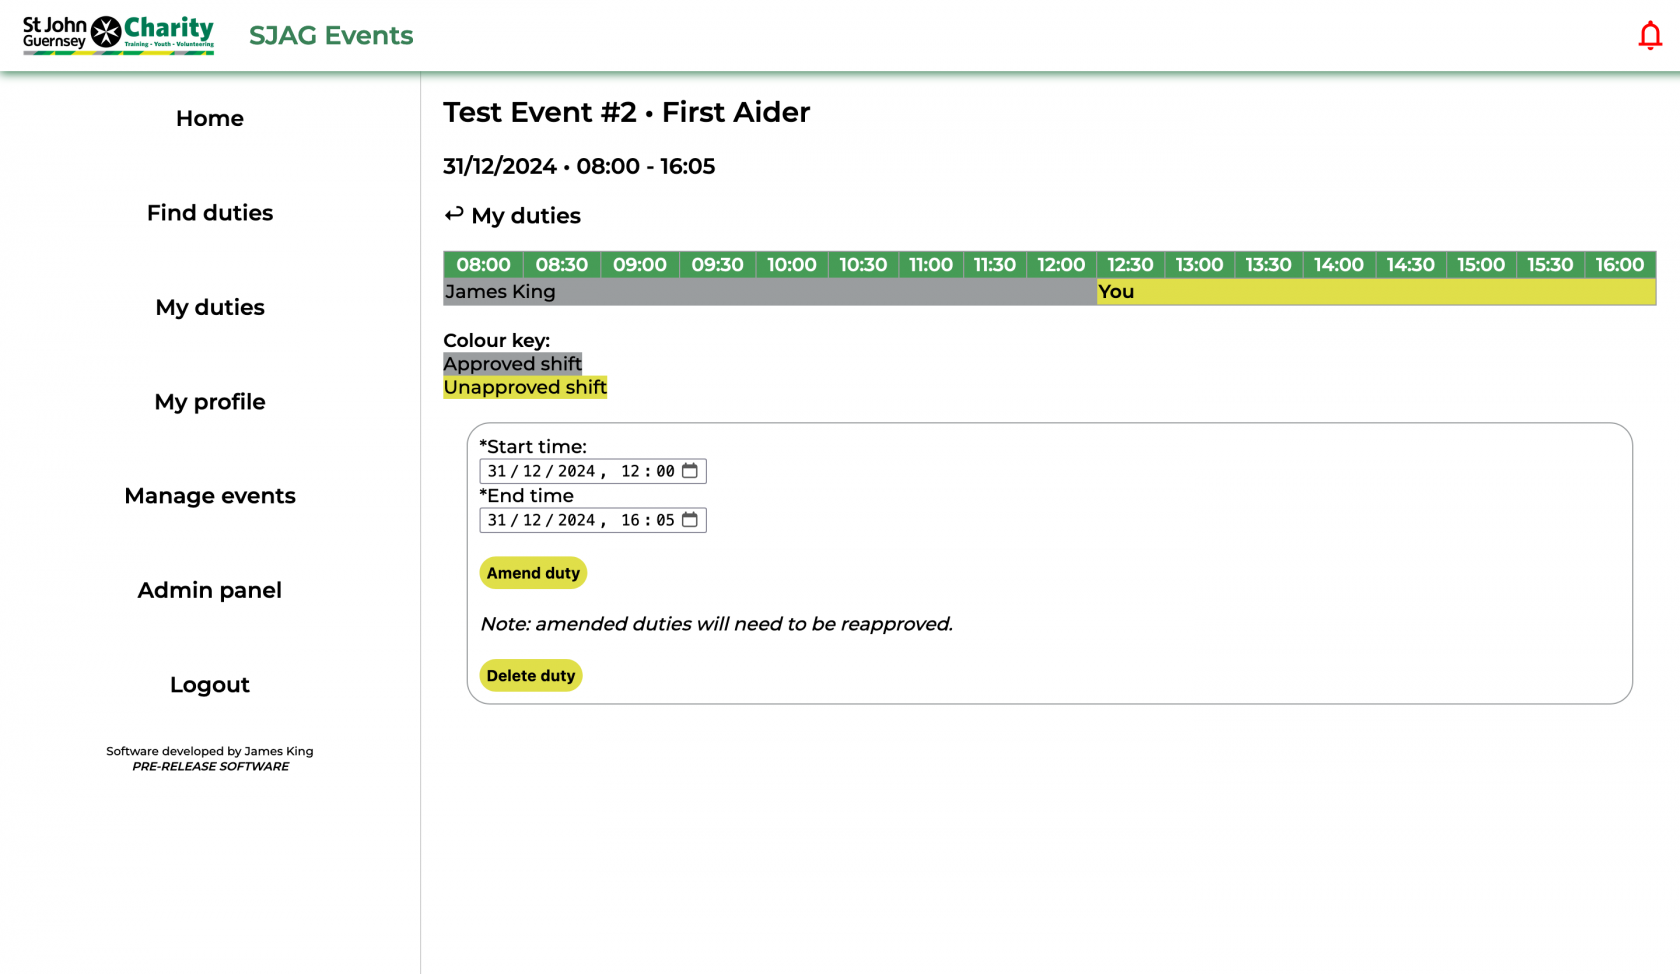](https://docs.jamesdev.co.gg/uploads/images/gallery/2024-09/edit-reqduty.png) | You can edit your duty booking's start and end times through the edit duty page. Simply adjust the times in the two field and click the 'Amend duty' button to save.
If you amend your booking after it has been approved it will need to be approved again by the event organiser.
|
# My duties
| [](https://docs.jamesdev.co.gg/uploads/images/gallery/2024-09/myduties.png) | The 'My Duties' page displays all the requirements and reserve duty bookings you have made on the system.
Duty names are colour-coded according to the type of event, using the same key as the paper duty lists: SJAG in blue, EAS in green, and joint events in red.
The 'Link SJAG Events to calendar' button will take you to the iCalendar feature page.
|
| [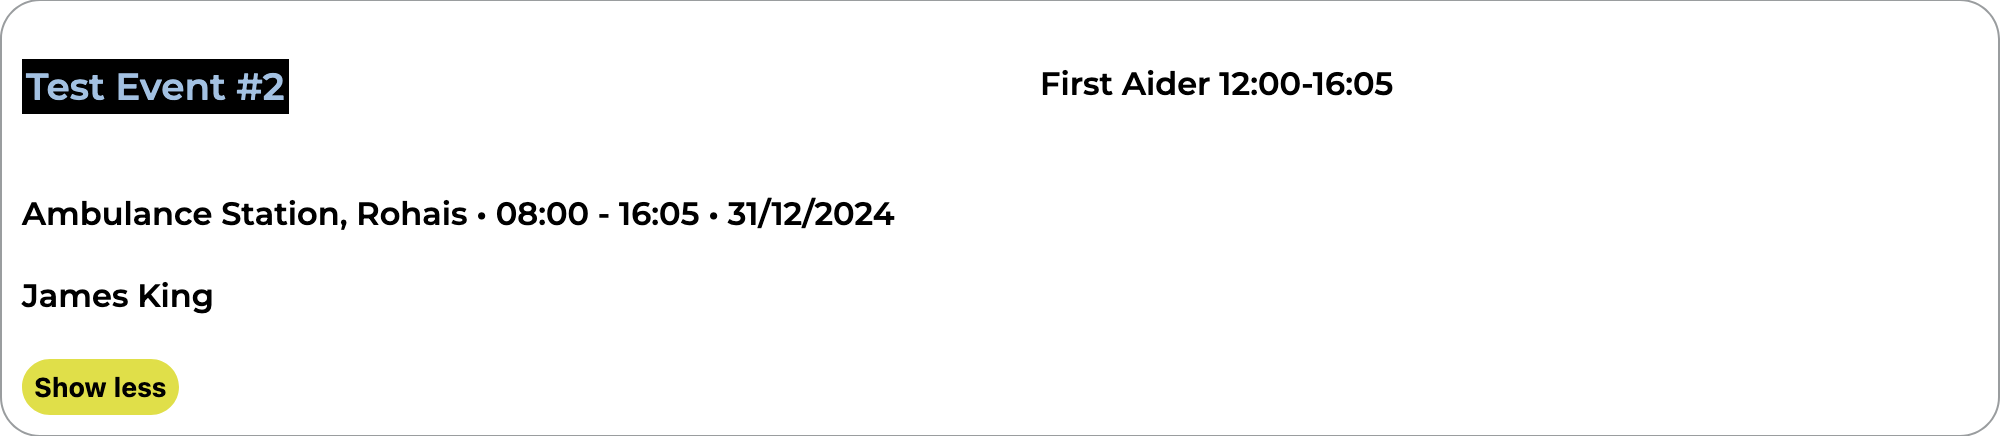](https://docs.jamesdev.co.gg/uploads/images/gallery/2024-09/myduties-bubble.png) | Each event is displayed in an "info-bubble". To prevent overcrowding, these are collapsed by default, only showing basic information. Clicking on the 'Show more' button will expand the bubble to show more information.
Clicking anywhere in the bubble will open up the event page, this contains more information on the event and is where you are able to make bookings.
Clicking on the event organiser name will open your default email app on your device, with a new email to the organiser's address.
Your booking is shown on the right side of the bubble, clicking on this will take you directly to the edit duty or edit reserve page - depending on the booking type.
|
# Book reserve duty
| [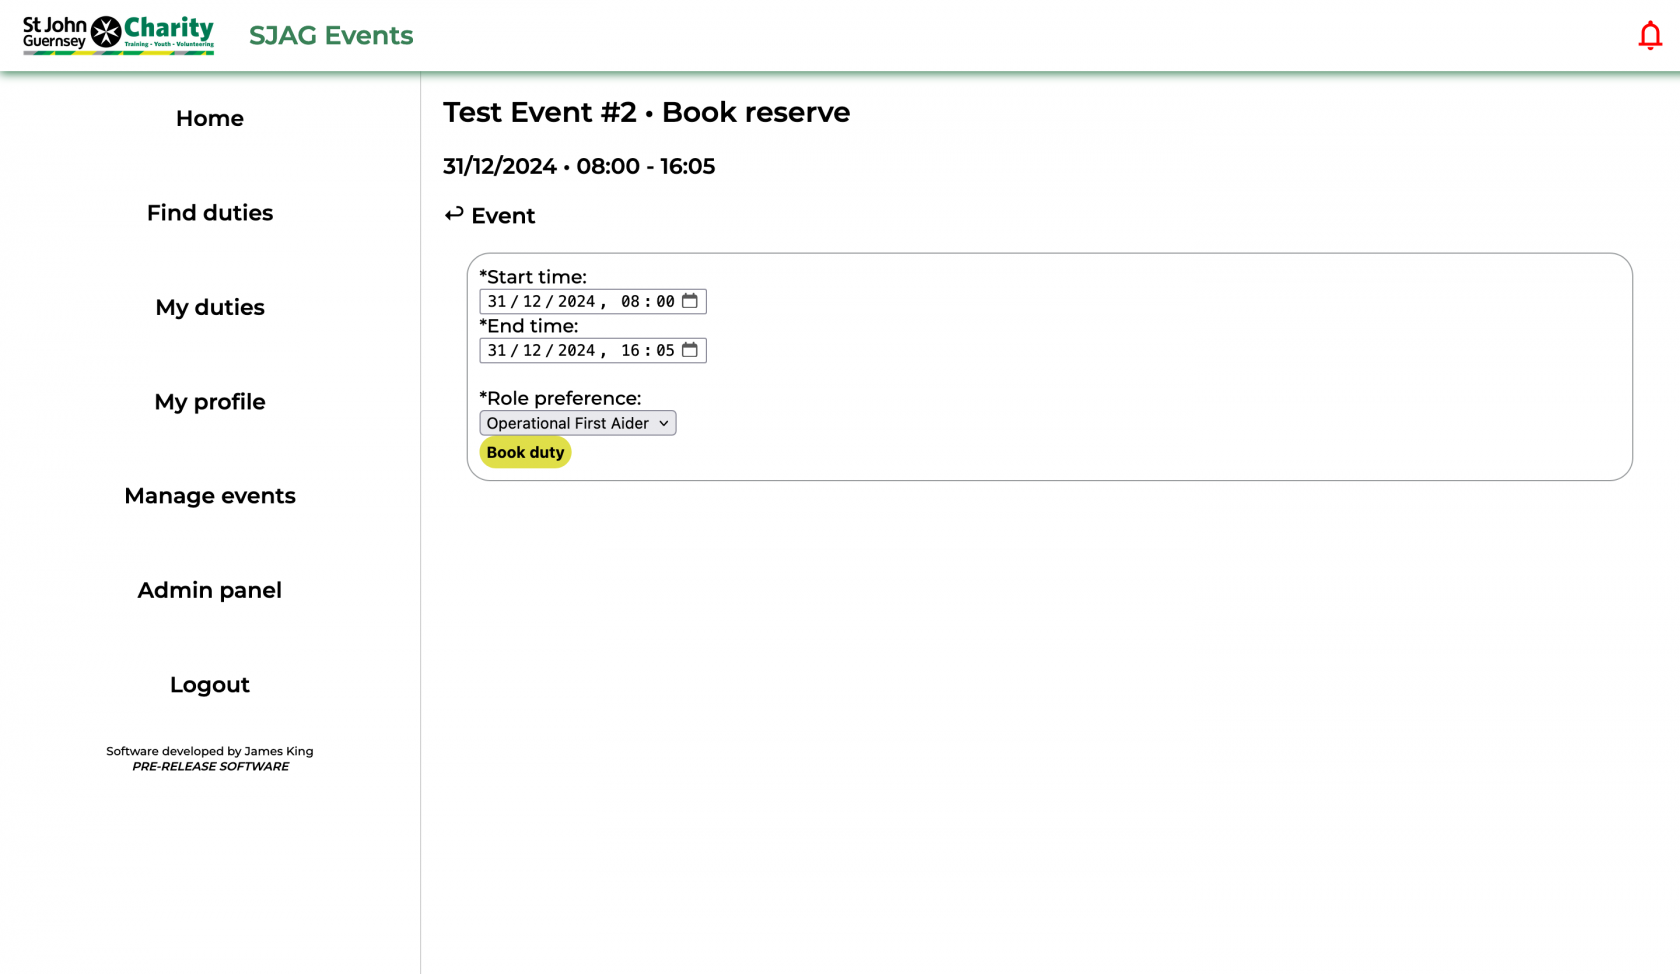](https://docs.jamesdev.co.gg/uploads/images/gallery/2024-09/book-reserve.png) | Booking a reserve duty is similar to that of booking a requirement based duty.
Fill out the form with your desired start and end time, then select which role you wish to act as from the dropdown. Then, click 'Book duty' to save.
|
# View, approve & edit reserve duty
| [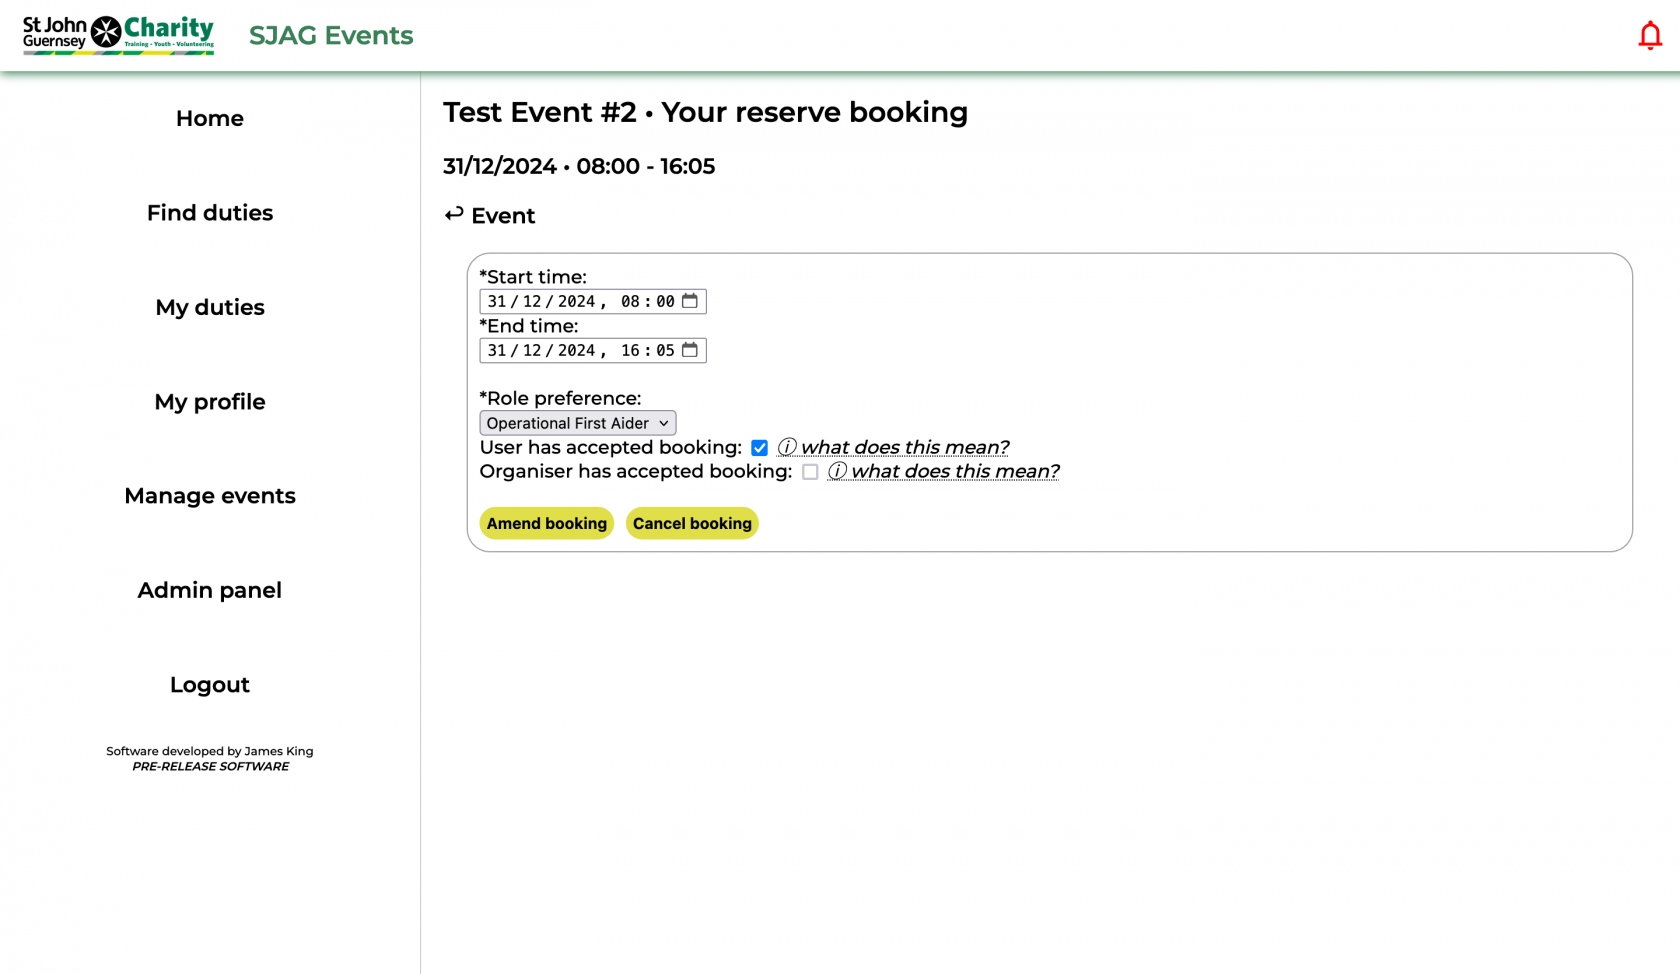](https://docs.jamesdev.co.gg/uploads/images/gallery/2024-09/edit-reserve-user.png) | Editing a reserve duty is similar to editing a requirement based duty booking.
Alter the values in the input boxes to change your start, end time, or role.
To approve a duty after an event-organiser modifies it, check the 'User has accepted booking' box.
Click 'Amend booking' to save your changes.
Alternatively, click 'Cancel booking' to cancel your duty.
**Note:** if the event organiser has already accepted your booking and you amend it, re-approval will be required.
|